Ceramic Tile Installation in Nashville, TN
Our professional installation team ensures your tile is properly laid with precision alignment, secure adhesion, and perfect grout lines that will stand the test of time.
Ceramic tile remains one of the most versatile and durable flooring options for Nashville homes. Whether you're updating a bathroom, creating a stunning kitchen backsplash, or installing new flooring throughout your home, we handle projects of all sizes. As a premier flooring solution provider in Music City, we understand that selecting the right tile can be overwhelming with so many options available.
We've been serving Nashville and the surrounding areas for years, building our reputation on reliability and exceptional results. Our ceramic tile services include free in-home consultations where we bring samples directly to you, transparent pricing with no hidden fees, and thorough cleanup after installation. You deserve flooring that not only looks beautiful but also increases your home's value and functionality. When you choose Nashville Flooring Company for your ceramic tile installation, you're partnering with a team that treats your home with the same care we would our own.
Ceramic Tile Installation Process
At Nashville Flooring Company, we utilize proven installation methods to ensure your ceramic tile project lasts for years. Our techniques focus on proper preparation, precise application, and attention to detail at every step of the process.
1. Design and Layout Planning
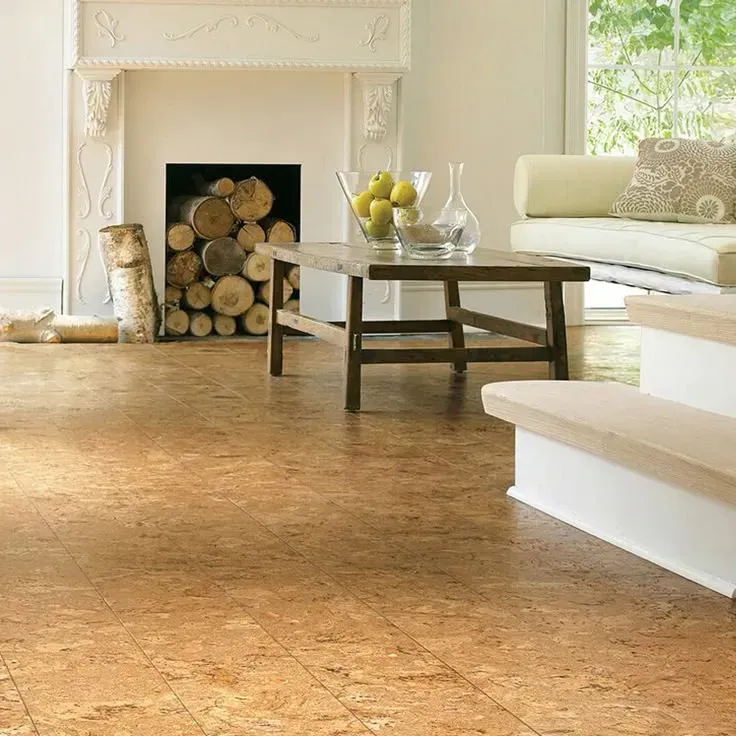
We help you visualize different ceramic tile patterns before installation begins. Our design team can show you how various layouts like checkerboard, herringbone, and subway tile patterns will look in your specific space. This visualization process eliminates guesswork and ensures you'll be happy with the final result.
Many customers find that diagonal tile installation creates an illusion of more space, while traditional grid patterns offer a clean, timeless look. We'll create digital mockups of different options so you can compare them side by side.
Our years of experience with ceramic and porcelain installations help us guide you toward patterns that will work best for your specific room dimensions and usage needs.
2. Preparing the Subfloor
We begin every ceramic tile installation by thoroughly assessing your subfloor. We remove any existing flooring, adhesive residue, and debris to create a clean surface. The subfloor must be structurally sound, flat, and free of cracks.
If we find any damaged areas, we repair them before proceeding. For concrete subfloors, we check for moisture problems that could affect your tile installation later. We use specialized moisture meters to ensure levels are within acceptable ranges.
For wood subfloors, we verify that the structure can support the weight of ceramic tile. Sometimes we need to reinforce the floor joists or add an additional layer of plywood to create a stable base. We also check for any flex or bounce in your floor that could cause tiles to crack later.
3. Choosing and Applying Underlayment
The right underlayment is crucial for your tile installation's success. We typically use cement board or backer board as they provide excellent support for ceramic tiles. These materials don't shrink or expand with moisture changes like some wood products do.
We carefully measure and cut the underlayment to fit your space precisely. Each piece is secured with special underlayment screws placed every 6-8 inches. We stagger the joints of the underlayment to avoid alignment with the subfloor seams, creating a stronger overall structure.
Once the underlayment is secured, we apply tile underlayment tape to all seams. This prevents movement between boards that could cause your tiles to crack. For uneven areas, we apply leveling compound to create a perfectly flat surface. A smooth, level base is essential for a professional-looking tile installation.
4. Waterproofing and Soundproofing
In moisture-prone areas like bathrooms and kitchens, we apply a waterproofing membrane over the underlayment. This critical step prevents water from seeping through to your subfloor, which can cause serious structural damage over time.
We pay special attention to corners, edges, and areas around plumbing fixtures. These vulnerable spots get extra waterproofing protection to ensure a complete moisture barrier. For shower installations, we create proper slopes toward drains to prevent standing water.
Soundproofing is another important consideration, especially in multi-story homes or apartments. We can install soundproof underlay beneath your tile to reduce noise transmission between floors. This material also provides some insulation benefits, making your floor feel warmer underfoot during cold months.
Before applying tile adhesive, we often use a tile primer on the prepared surface. This improves adhesion and ensures your tiles will stay firmly in place for years to come.
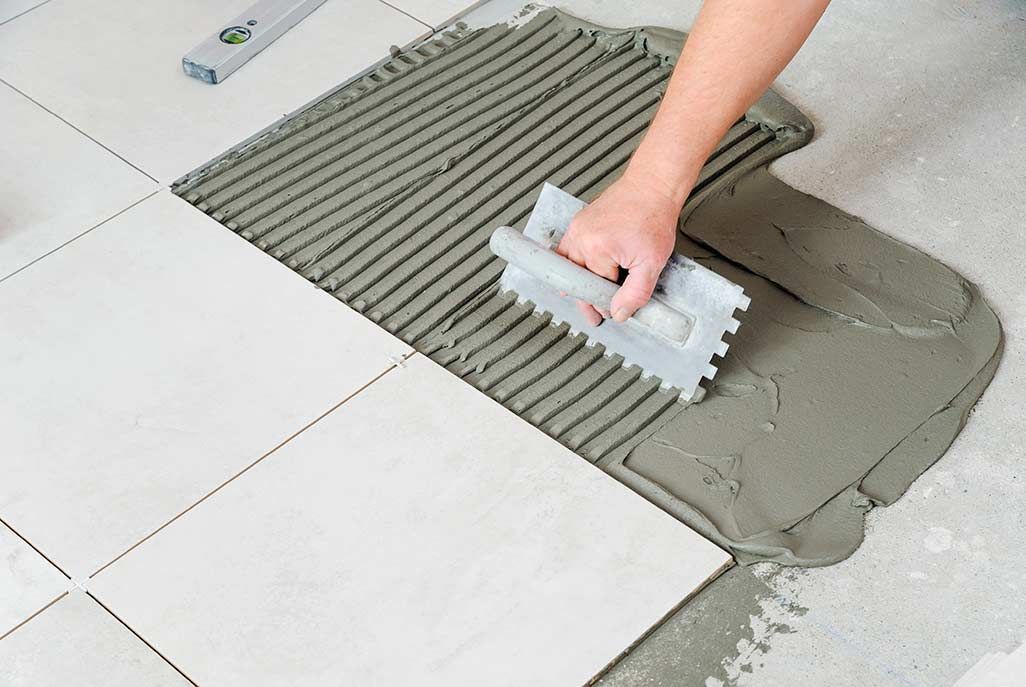
5. Applying Adhesive and Mortar
We always select the appropriate adhesive based on your specific tile type and installation location. For floor installations, we typically use thin-set mortar which provides superior strength and water resistance. For wall applications, we might recommend a lighter mastic adhesive for vertical holding power.
Our installers use the correct notched trowel size for your specific tile dimensions - larger tiles require deeper notches to ensure proper coverage. We apply mortar in small sections to prevent premature drying, using a 45-degree angle technique that creates consistent ridges.
Back buttering is essential for larger format tiles. This means applying a thin layer of adhesive to the back of each tile before placement. This technique ensures 95% coverage and eliminates hollow spots that could cause cracking later.
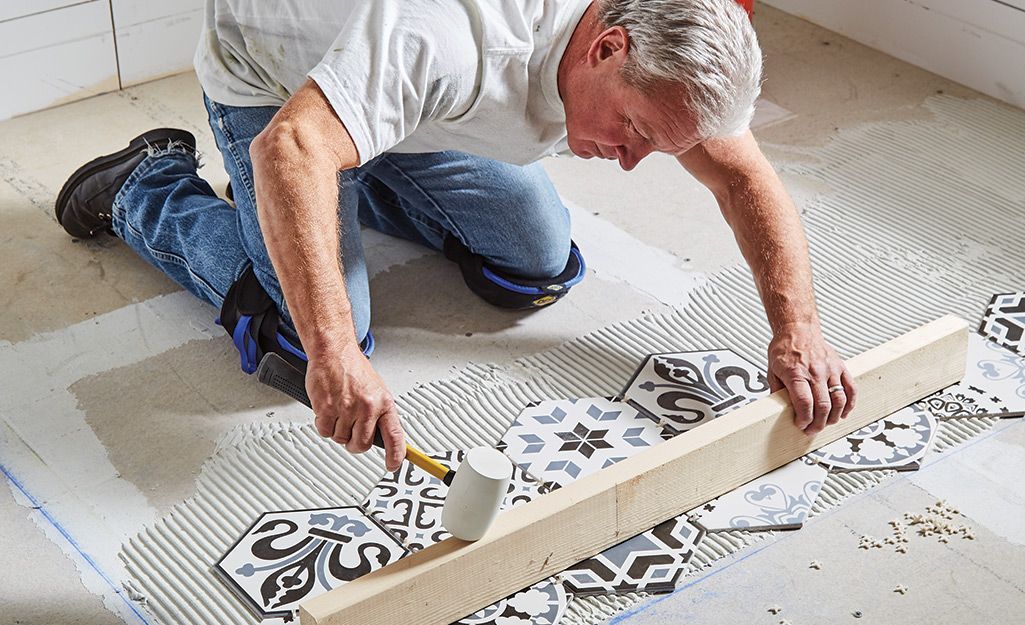
6. Setting Tiles and Spacing
We always begin with a dry layout to visualize the final pattern and minimize awkward cuts. This planning stage helps us identify potential issues before adhesive is applied.
Our team uses professional-grade tile spacers to maintain consistent grout lines throughout your installation. These small plastic pieces ensure perfect alignment and can be removed after the adhesive sets.
For larger format installations, we employ tile leveling systems to prevent lippage - the uneven edges between adjacent tiles. These systems use clips and straps to hold neighboring tiles at the same height while the adhesive cures.
We work methodically across the installation area, checking alignment frequently with a level. This attention to detail ensures your tile surface remains perfectly flat and visually appealing.
7. Grouting Process
We carefully select the right grout type for your specific installation. For floor tiles with joints wider than 1/8 inch, we recommend sanded grout for its durability and crack resistance. For wall tiles or narrower joints, we use unsanded grout to prevent scratching delicate surfaces.
For high-moisture areas like bathrooms or kitchens, we often suggest epoxy grout which offers superior stain and water resistance. This premium option costs more but requires less maintenance long-term.
We precisely mix grout to manufacturer specifications using clean water and controlled mixing techniques. The consistency should be similar to peanut butter - not too dry or too runny. This ensures proper adhesion and prevents shrinkage or cracking as it cures.
8. Finishing Touches and Post-Installation
You can keep your new tiles looking pristine by following some simple care guidelines. For daily cleaning, sweep or vacuum with a soft brush attachment to remove loose dirt and debris that can scratch your tiles. Follow up with a damp mop using plain warm water or a mild, pH-neutral cleaner specifically formulated for tile.
Avoid harsh cleaning chemicals, especially acidic cleaners like vinegar on natural stone tiles, as they can damage the sealer and etch the surface. We recommend purchasing quality grout cleaning tools like soft bristle brushes for periodic deep cleaning of grout lines.
For stubborn stains, use a paste of baking soda and water, allowing it to sit for 10 minutes before gently scrubbing. Rinse thoroughly with clean water to remove any residue that might dull the finish over time.
Professional Tiling Services vs. DIY Tiling
When considering tile installation for your home, you're faced with a critical choice: hire professionals like us at Nashville Flooring Company or tackle it yourself. This decision impacts the quality, cost, and timeline of your project. We bring specialized tools and expertise to every job. Our professional installers have years of experience working with various tile materials and solving unexpected challenges that often arise during installation. Professional tile installation reduces stress and ensures lasting results.
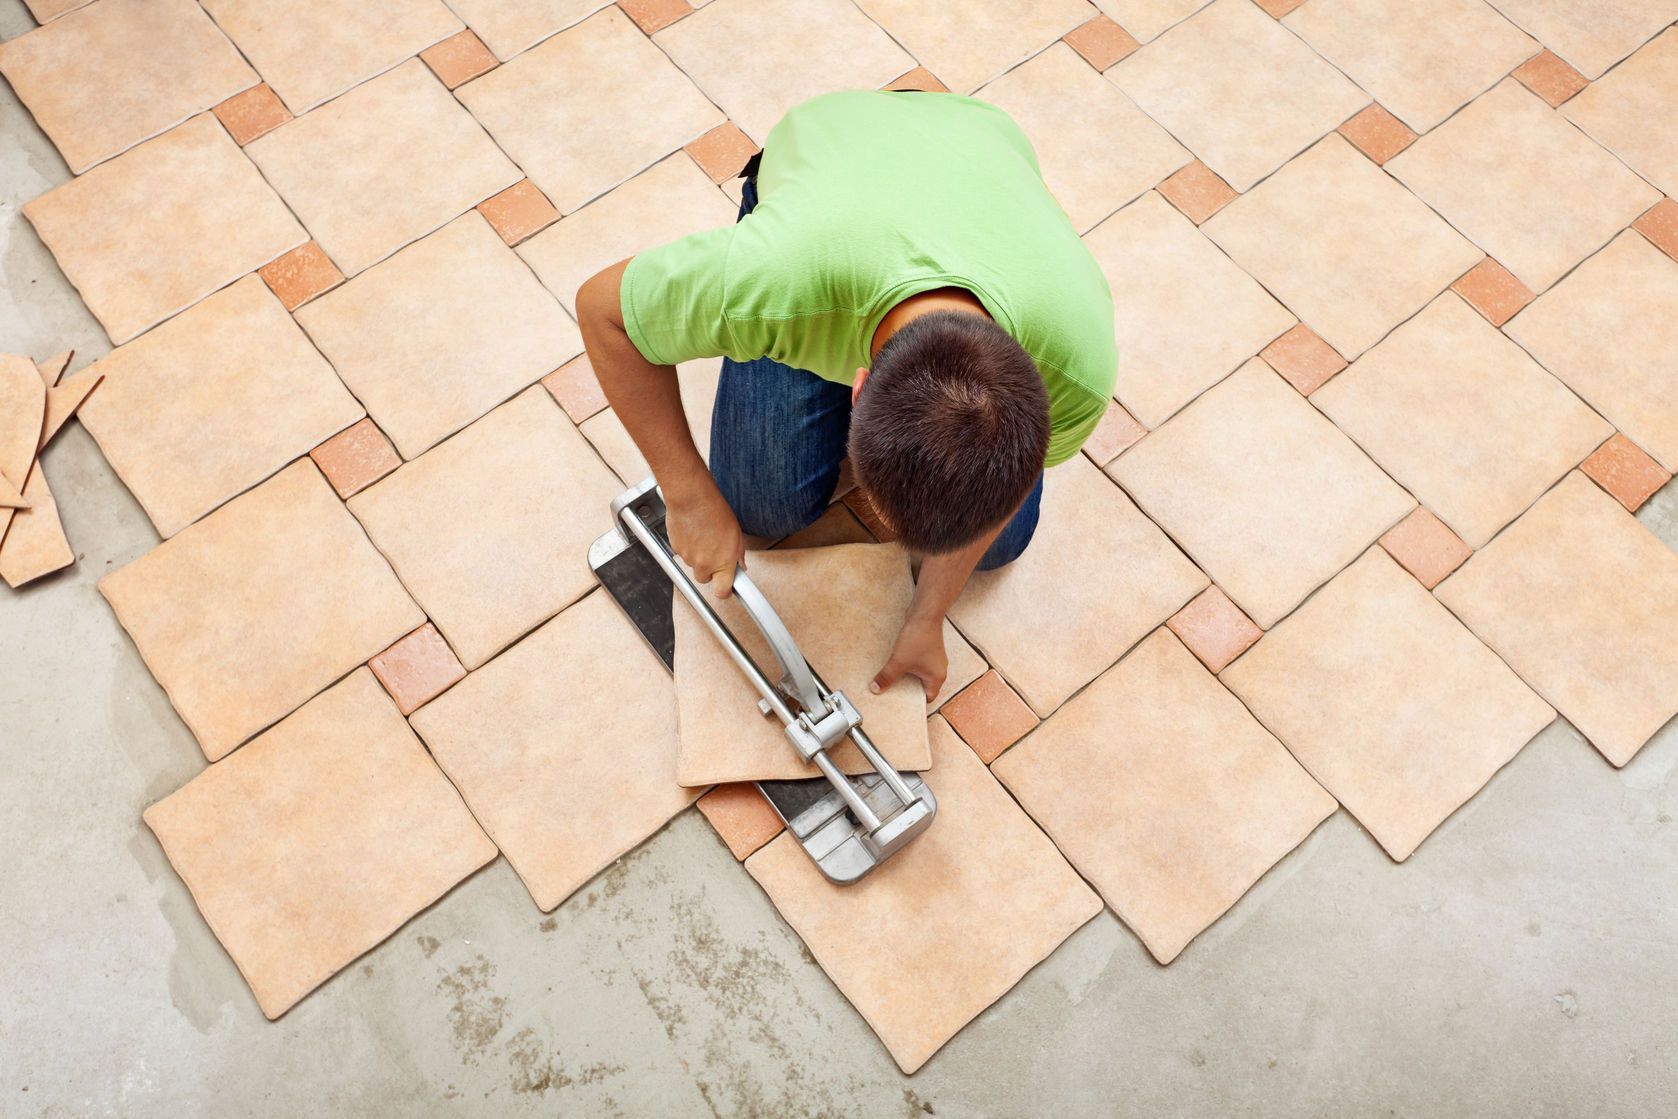
DIY tiling projects can be appealing if you're working with a tight budget. You might save on labor costs initially, but consider the hidden expenses. You'll need to purchase or rent specific tools like tile cutters, trowels, and wet saws, which adds to your overall investment. Time is another crucial factor. What takes our team a day or two might stretch into weeks for DIY enthusiasts, especially if you're only working on weekends. Plus, any mistakes could lead to costly repairs down the road.
We handle every aspect of your project from surface preparation to final cleanup. This includes proper subfloor preparation, ensuring no cracks or uneven spots remain before installation begins. For complex areas like bathrooms or intricate tile patterns, our expertise becomes even more valuable. We precisely cut tiles to fit around fixtures, ensuring professional results that stand the test of time.
Understanding Tile Ratings
Tile hardness ratings help you choose the right product for specific areas of your home. The PEI (Porcelain Enamel Institute) scale rates tiles from 1-5 based on durability. For wall applications, PEI 1-2 tiles work well. For residential floors, we recommend PEI 3 tiles. High-traffic commercial spaces require PEI 4-5 rated tiles. The proper tile installation technique matters for lasting beauty, regardless of rating.
Water absorption rates are crucial too—the lower the rate, the more moisture-resistant the tile. Porcelain tiles typically have absorption rates below 0.5%, making them excellent for wet areas. Standard ceramic tiles have rates between 0.5-3%, suitable for most indoor applications.
COF (Coefficient of Friction) ratings measure slip resistance. For safety, we recommend tiles with a rating of 0.42 or higher for bathroom floors and other wet areas.
Considerations for High Traffic Areas
For spaces with heavy foot traffic like entryways and kitchens, choosing professional tile installation services ensures your flooring will last. We recommend porcelain tiles with PEI ratings of 4 or 5 for these areas. Darker colors and textured surfaces help hide dirt and provide better traction.
Slip-resistant tiles are essential for high-traffic areas, especially those exposed to moisture. Look for tiles with a textured finish rather than a high-gloss surface. We can help you select tiles with expertise for specific materials and applications.
Grout lines should be kept minimal in high-traffic zones, as they tend to collect dirt and require more maintenance. Consider larger format tiles with rectified edges to achieve thinner grout lines. We often suggest medium to dark grout colors that won't show stains as readily as lighter options.
Understanding Different Tile Types
We offer a wide range of ceramic tile options to suit your specific needs. Ceramic tiles are made from clay that's been fired in a kiln, making them durable and affordable for most indoor applications. Porcelain tiles, a subset of ceramic, are fired at higher temperatures, resulting in a denser, less porous product that's ideal for bathrooms and kitchens.
Floor tiles typically have thicker construction and more slip-resistant surfaces than wall tiles. Wall tiles are generally lighter and easier to cut, but they shouldn't be used on floors as they may crack under foot traffic.
For unique design statements, consider mosaic tiles (small pieces arranged in patterns) or try hexagon tiles for a modern geometric look. Large format tiles (12"×12" or bigger) create fewer grout lines and make spaces appear larger, while small format tiles offer more design flexibility and better traction.
Request Your Free Quote Today
Transform your home with sustainable flooring options today! Our eco-friendly flooring solutions are ready to bring beauty, durability, and environmental responsibility to your Nashville home.
Call us at (615) 555-7890 to schedule your free in-home consultation. Our flooring experts will bring samples directly to you, making it easy to visualize how each option will look in your space.
Request your free quote today! Complete our simple online form, and we'll respond within one business day with pricing options tailored to your specific needs.
